Free shipping over $35 · 60-day returns · Price-watch guarantee

Ventari

iienjoy

iienjoy Kintsugi Repair Kit 4 Colors Food Safe Kintsugi Kit Repairs Broken Ceramics Jade Glass Meaningful Pottery Kintsugi

$23.99$29.99

681+ bought in the past month

Sobre este artículo

  • Modern Kintsugi: Kintsugi kit turns broken ceramics, glass, wood, and more into stunning pieces of meaningful art. Celebrate imperfections and give beloved items a second life.
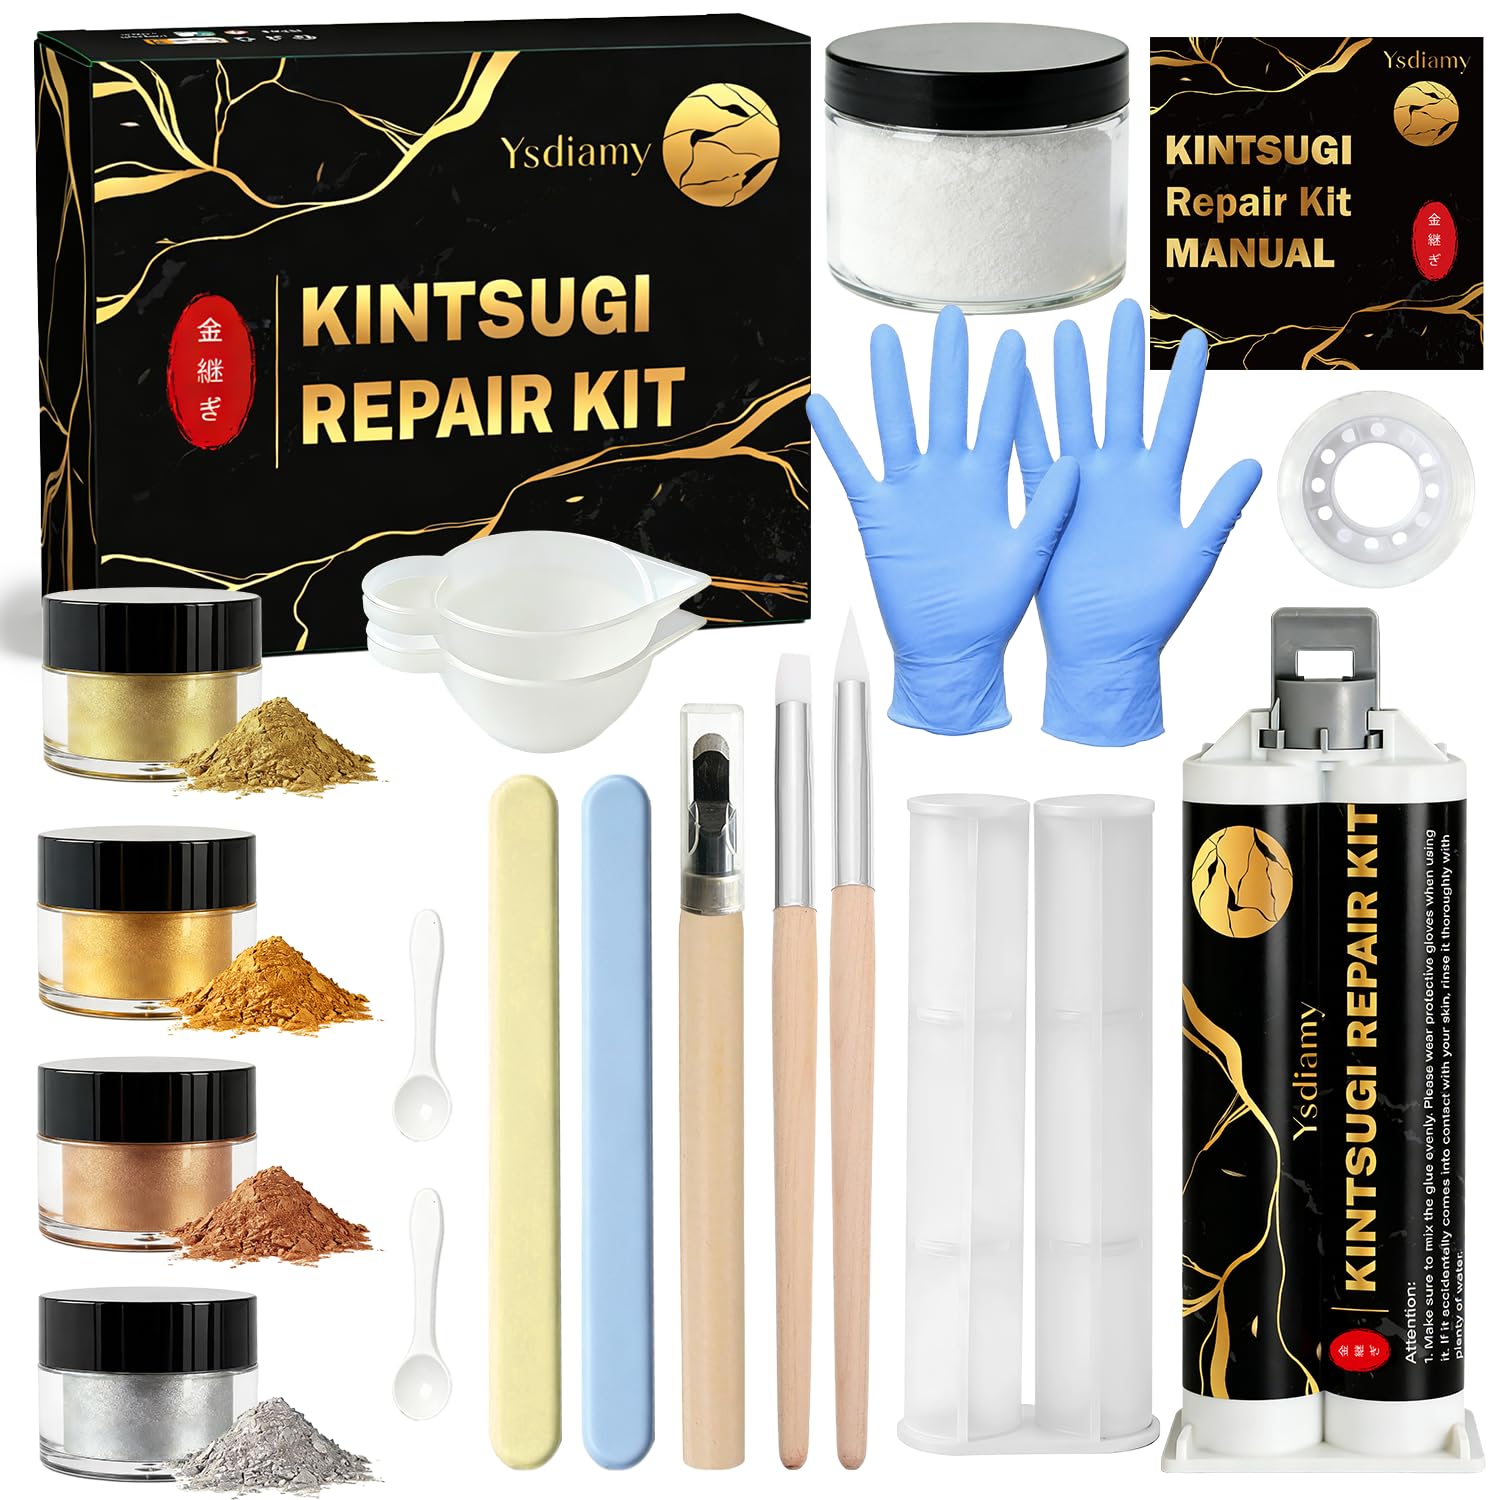
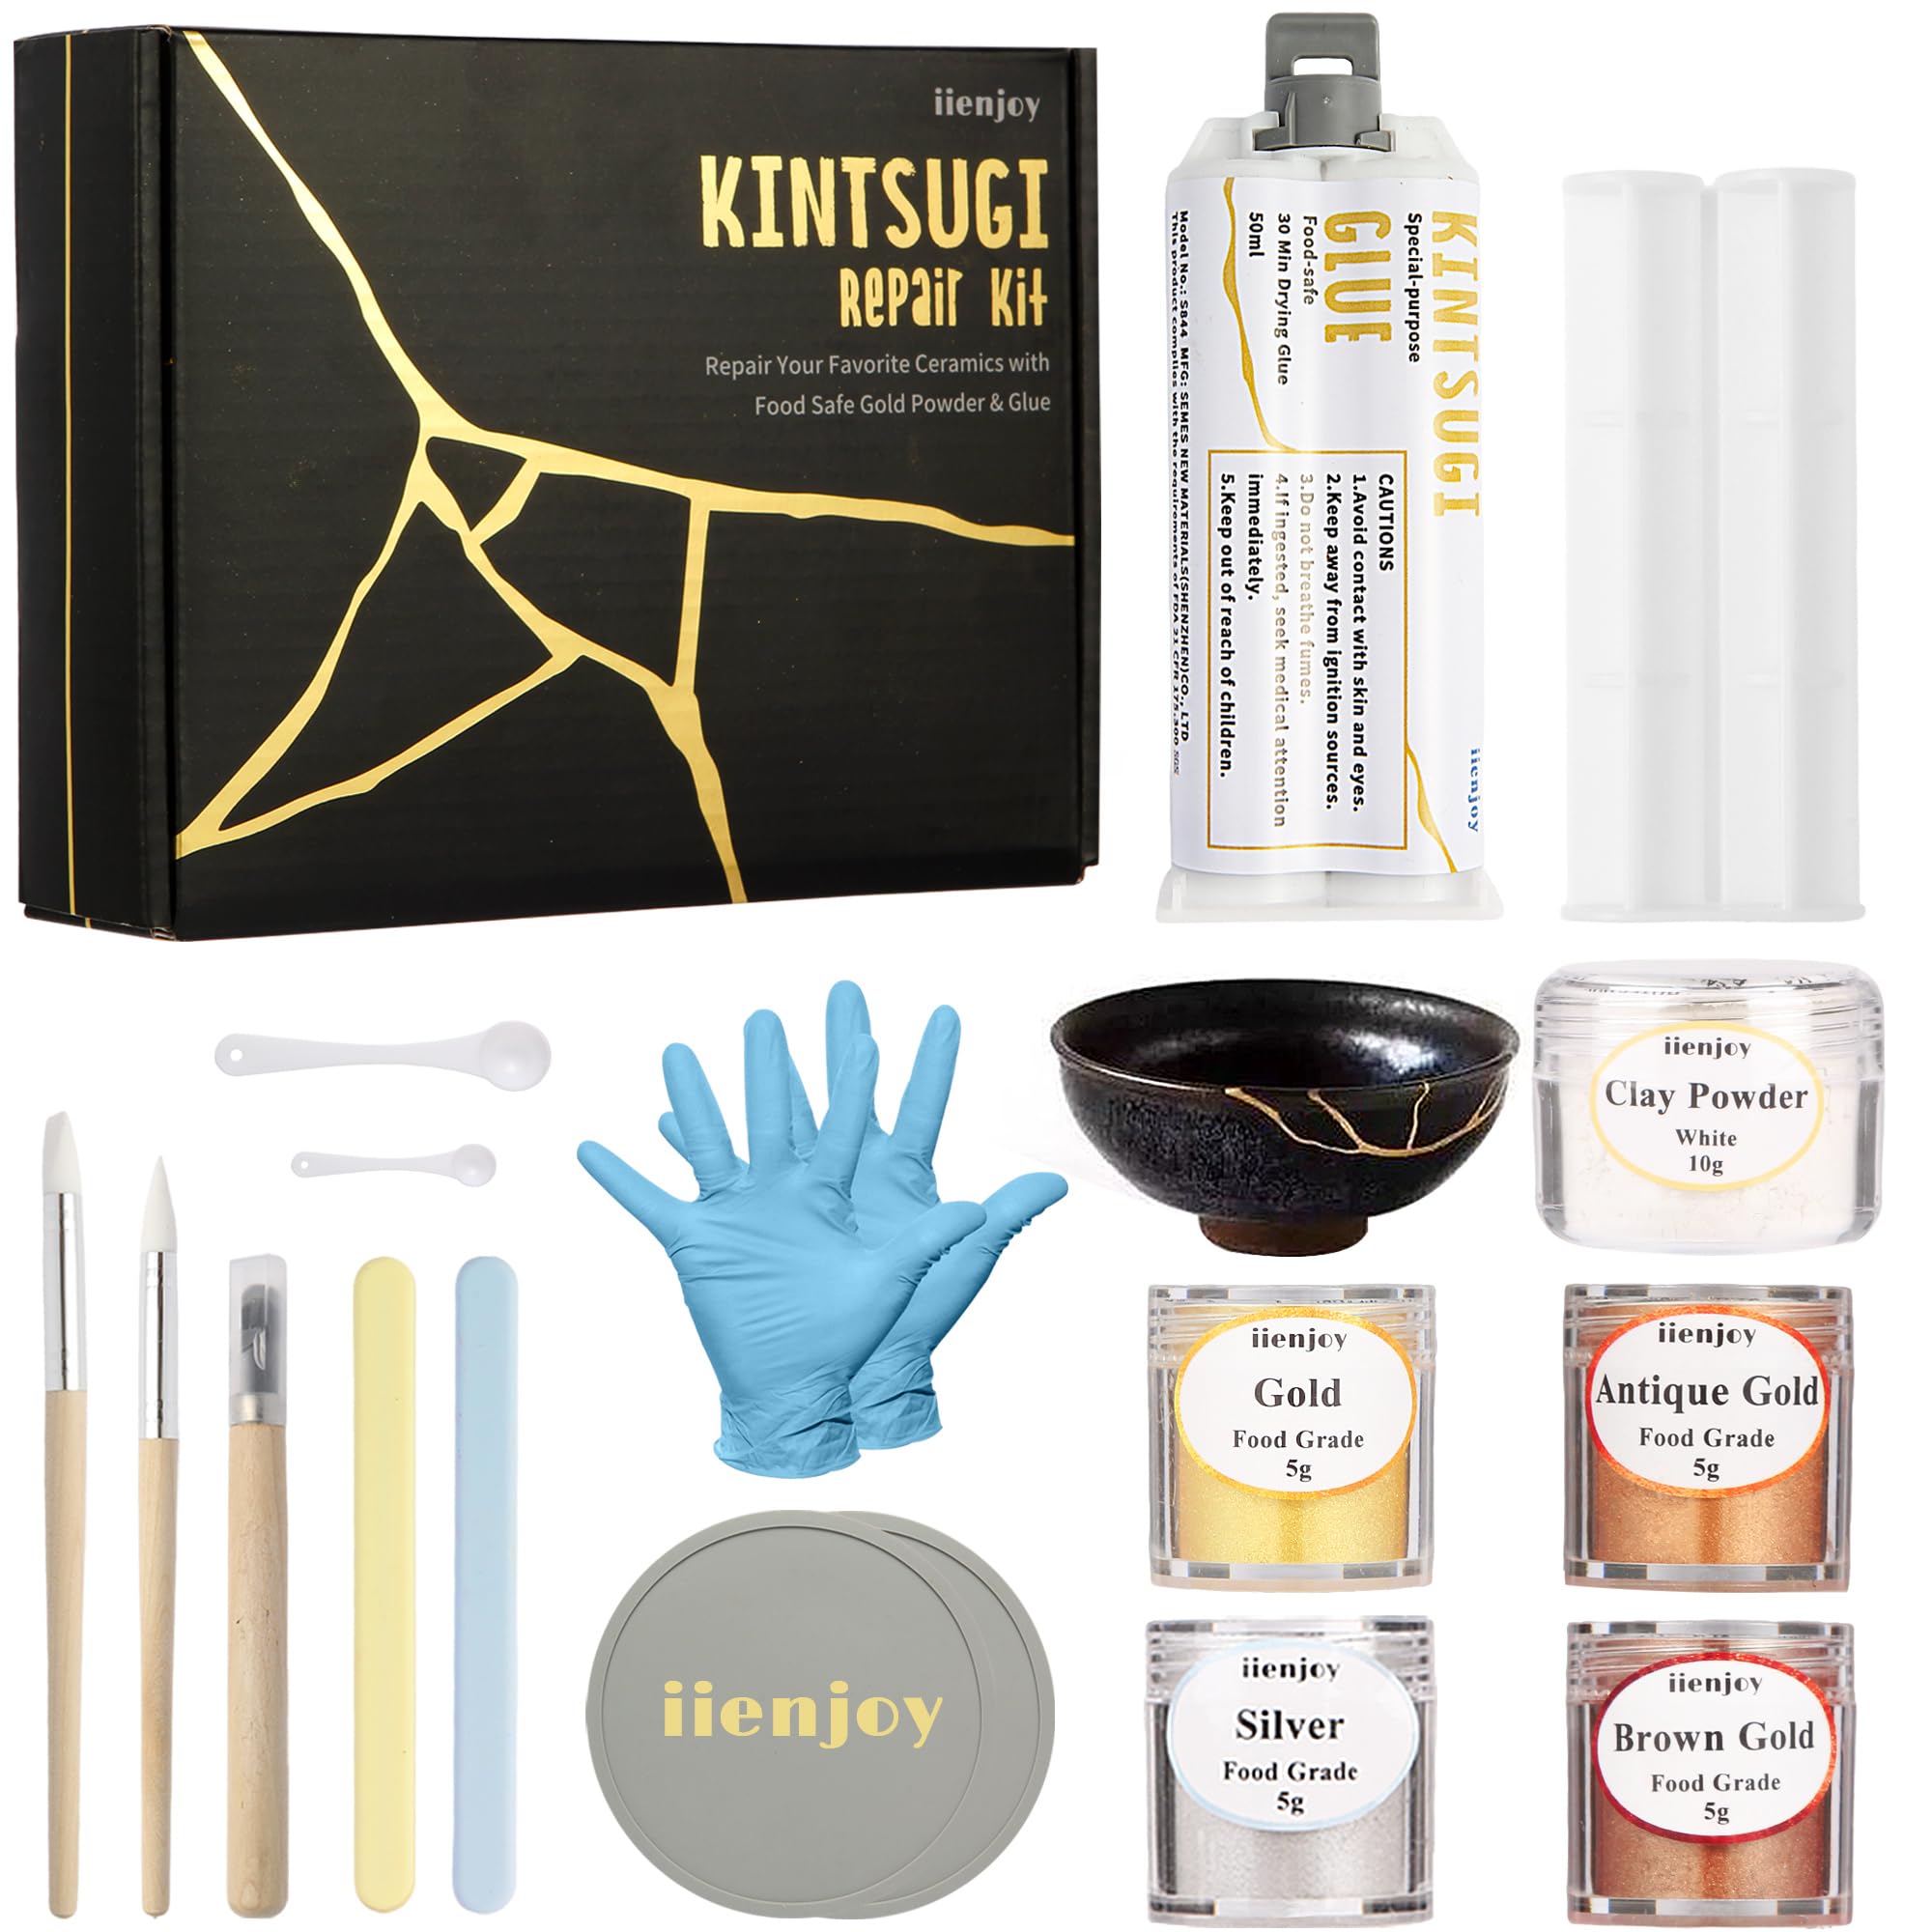
  • Eco-Friendly Kintsugi Kit: Includes everything you need - 50ml food-safe AB epoxy glue, 4 metallic-colored pigments, gloves, wooden sticks, and reusable silicone mixing tools—easy to clean and built to last. Safe, beginner-friendly, and better for the planet. Perfect for mindful, mess-free crafting at any skill level.
  • Multi-Material Repair Kit: Works on ceramics, glass, metal, jade, wood, and more. Perfect for restoring broken items or adding gold accents to plates, mugs, vases, and home décor. Ideal for both repair and decoration,explore endless possibilities.
  • A Unique & Mindful Gift: Give the gift of creativity and renewal. This Kintsugi kit makes a thoughtful present for artists, DIY lovers, or anyone who finds beauty in flaws and joy in hands-on making.
  • Simple, Safe & Practical: Easy-to-follow instructions with a 30-minute slow cure time let you complete repairs at your own pace (food-grade epoxy resin cures longer than standard types). Repaired items are safe to use and dishwasher-safe after 24 hours. Need help? We're here for you.

Key details

best_sellers_rank
#6,421 in Arts, Crafts & Sewing ( See Top 100 in Arts, Crafts & Sewing ) #19 in Ceramic & Pottery Tools
manufacturer
iienjoy
date_first_available
March 14, 2025

Dimensions and fit

dimensions
7.01 x 5.63 x 2.01 inches
weight
12.3 ounces
package_dimensions
7.01 x 5.63 x 2.01 inches
item_weight
12.3 ounces
Highlights

About this item

  • Modern Kintsugi: Kintsugi kit turns broken ceramics, glass, wood, and more into stunning pieces of meaningful art. Celebrate imperfections and give beloved items a second life.
  • Eco-Friendly Kintsugi Kit: Includes everything you need - 50ml food-safe AB epoxy glue, 4 metallic-colored pigments, gloves, wooden sticks, and reusable silicone mixing tools—easy to clean and built to last. Safe, beginner-friendly, and better for the planet. Perfect for mindful, mess-free crafting at any skill level.
  • Multi-Material Repair Kit: Works on ceramics, glass, metal, jade, wood, and more. Perfect for restoring broken items or adding gold accents to plates, mugs, vases, and home décor. Ideal for both repair and decoration,explore endless possibilities.
  • A Unique & Mindful Gift: Give the gift of creativity and renewal. This Kintsugi kit makes a thoughtful present for artists, DIY lovers, or anyone who finds beauty in flaws and joy in hands-on making.
  • Simple, Safe & Practical: Easy-to-follow instructions with a 30-minute slow cure time let you complete repairs at your own pace (food-grade epoxy resin cures longer than standard types). Repaired items are safe to use and dishwasher-safe after 24 hours. Need help? We're here for you.

De la marca

Product detailProduct detailProduct detailProduct detailProduct detailProduct detail

Product videos

Product video 1

Customer reviews

115 reviewsPositive

Rated 4.4/5 across 115 reviews — well received overall.

  • 100% of sampled reviews are from verified purchases.
  • 80% of sampled reviews give 4–5 stars.

Customers say

Customers find the kintsugi repair kit to be of excellent quality and incredibly easy to use, with different color choices and effective results.

Generated from the text of customer reviews

Reviews with images

Customer review image for Fixed my favorite coffee mug — with styleCustomer review image for Fixed my favorite coffee mug — with styleCustomer review image for Fixed my favorite coffee mug — with styleCustomer review image for Fixed my favorite coffee mug — with styleCustomer review image for Fixed my favorite coffee mug — with styleCustomer review image for Fixed my favorite coffee mug — with styleCustomer review image for Fixed my favorite coffee mug — with styleCustomer review image for Fixed my favorite coffee mug — with style
See all photos
★★★★★

Good starter set, but here's some advice

I have never done kintsugi before. I think this is a really good starter set for non-traditional materials kintsugi, and I appreciate that it’s food and heat-safe. With a couple adjustments to materials (and a lot of practice) I will eventually use these tools and materials to repair a tea set that I really want to turn out well. The silicone tools are easy to use, the scraper is a must-have, and I find the epoxy easy to work with. I don’t particularly like the colors of the mica (I assume) powder because none of them look like real metal (haven’t tried the silver), but the quality seems fine. As others have noted, the lack of measurements on the glue, and the mis-match between the size of the scoops and the mixing directions is a problem, but the formula seems forgiving enough that I’ve just estimated and things have turned out fine. After playing around with the set on a bunch of broken bowls I’ve been stockpiling (all mass produced china), I have these observations and advice. I began (as many people seem to) treating the repair process as one step: gluing the broken pieces together with tinted epoxy, which seeps out at the join, giving the golden seam. The problem is the results aren’t very elegant: it’s hard to control the evenness of the bead of glue, and the powder didn’t have the sort of true-gold luster I was going for, even when I mixed different shades together, so it looked cheap. With just a little epoxy seeping through, the gleam of the mica doesn’t show and the join is just stained, not shiny. With more epoxy, I got an uneven bead, and I thought the bigger, raised seam looked sloppy anyway. If I scraped it down, I scraped all the light-reflective part off and was left again with a stained join. So, here’s the method I’ve hit on. In addition to the tools included, I used isopropyl alcohol (at least 90%) for clean up (with cotton pads and a rag. Use this only on the china if you’re concerned about degrading the silicone tools), painter’s masking tape, fine grit sanding paper (600 or so), a fine-tip paint brush, and a loose, soft paint brush (both cheap, the type for acrylics). There are three steps to traditional kintsugi: bonding, patching, and applying the gold. I got much better results if I did the process following these three steps. Step 1: Mix the epoxy with a bit of mica powder as a colorant so you can see the seam. I didn’t sand my seams first to widen them, so they were very narrow and would be hard to see if I just used the uncolored epoxy (if you want to see a wider, flat seam, sand the broken faces first). Contrary to the included directions, spread it thinly it on the faces you’re going to join right away, while it’s still thin and easy to spread. Then let them sit 30 minutes until the epoxy becomes tacky. Fit the pieces together and hold the joins together for 2-3 minutes, then gently set them down to cure. If you do this too soon, the pieces will slip against each other and the bonding process will try your patience (and hand strength), but once the glue is tacky enough, it binds pretty quickly and doesn't have to be held tightly. It can help to use painter’s masking tape to hold the pieces in place as they dry (some of my joins shifted while drying when I didn’t do this. You can break them apart in the first couple hours, but when it's fully set, it’s set). The tape shouldn’t mess up the final product if it touches a seam, as there shouldn’t be enough epoxy to seep out, and, if there is, you can scrape it off once it hardens. Wait at least an hour for this, but you can scrape it even when it’s fully cured, as it comes off of china glazes pretty easily. If you get epoxy where you don’t want it, wipe it off using the alcohol before it hardens. Q-tips also come in handy here. Step 2: Once the entire piece is glued back together and the epoxy has cured (24 hours), mix up another batch of epoxy with the clay to patch any chips and holes. If you don’t wait until the epoxy is fully cured, you run the risk of knocking pieces off as you work. Again, I use the epoxy right away, though it needs to set up a bit for bigger holes. I used painter’s tape to plug the opposite side of the holes, and it worked well. You can smooth it with a damp finger once it’s become putty-like. I did bigger holes and chips in more than one session. Once it has dried, sand and carefully scrape the epoxy patch until you’re happy with it. I want everything to be pretty smooth, because I don’t want germs and dirt getting trapped in the cracks when I use the dishes. The epoxy is softer than the china glaze, so sanding didn’t mess up the glaze except for one piece that was textured. I had done a sloppy job on that one (one of the first pieces I worked on), so had to remove more epoxy than I otherwise would have. I’ve seen videos of people being really sloppy with their epoxies/resins at stages 1 and 2, but the overall result will be better the more careful you are. I’m also using this mixture to fix some chips that I won’t be gilding because it blends into light colors really well. It would also be good for invisible mends on light-colored dishes. Step 3: Mix the smallest batch of epoxy possible with your desired powder. Using a fine-tip paint brush, very carefully paint it over the joins and patches. The epoxy gets too tacky for this really quickly, so you’re probably going to waste some epoxy and powder. I’d like to find something that dries slower to avoid this waste (especially as I graduate to more expensive powders). Clean up any mistakes right after you finish with alcohol or the scraper. After the epoxy hardens a bit but while it's still tacky (at about an hour), go back and use the loose paint brush dipped in your powder to dust the seam (try to keep the brush from touching bare glue, but both brushes can be cleaned with alcohol). The final results will gleam better and look more metallic this way. Let it dry and wipe the extra powder off with a damp rag. I then used a silk rag to shine it, but by this point I was using a different powder, so I’m not sure if that step benefits the mica powder. Truthfully, I didn’t like any of the powder colors, so I got a metal powder, Meyspring Gilded Gold True Metallic Pigment Powder, and used it instead, same method as I just outlined. I’m very happy with that result (though recognizing my technique needs some practice). With a fine brush, you can get very fine lines, flush against the join, looking like real metal (because it is) with a rich luster. I’m going to use these dishes for food, even though this powder isn’t marked as food safe. I’m figuring any metal residue will be minimal, and, of course, I won’t microwave the dishes or use them for hot things. In short, if you’re careful, you can get pretty elegant results using just the tools and materials provided + a couple further things you probably already have lying around. With the additional true metal powder, I’m fully satisfied with the results. Read more

morgauseVerified purchase
★★★★★

Great choice in Kintsugi kits

I have a cat who loves to knock things off the counters. I kept a few, thinking I'd get around to gluing them together, but didn't. I ran across Kintsugi and was thinking it would be a useful thing to have around. The kit comes with four colored powders, 5g ea, in gold, antique gold, brown gold (this is bronze) and silver and a white clay powder, 10g. The glue is food-grade, 50ml, two silicone stir sticks, two round silicone mats, two silicone applicators (they call brushes), two scoops, gloves and one scraper. It's pretty pretty easy to use. I do find the measurements to be harder to follow. This is because the epoxy glue has no measurement lines to know how much you dispense. The scoops for the powder are listed as 0.25g and 0.5g, The ratio for mixing is 0.3g of powder to 1ml of glue, so either a tiny bit more than the small scoop and a little less than the large scoop. Why not incl a 0.3 and 0.6g for easier precise mixing, maybe a third scoop at 1.2g? So I took a star off, could be better. I'm not an expert so I just kind of end up putting out as much glue as I think I need and then mix in the powder. It dries in about an hour, though they recommend waiting 24h before scraping any excess off. I found it pretty easy to apply, smooth out and scrape the excess after drying. It does allow you to control the look a good bit and w/the powders you don't have to worry so much about glue squeezing out when the pieces are put together. You can also fill in the areas missing the smaller pieces using the clay powder and then cover with the metallic color. I think this was a great choice, it comes with reusable silicone tools/mats and greater variety of colored powders. Read more

CyndirVerified purchase
★★★★

Looks ok at a distance. Up close the gold isn't fooling anyone

Pretty neat product but a little disappointed with the final result. The gold looks fake and glittery tried lots of glue to powder ratios and all the same when it dries. Its not terrible but not the final effect that is advertised. Read more

Lew k.Verified purchase
★★★★★

Fixed my favorite coffee mug — with style

One of my favorite mugs snapped its handle, and instead of tossing it I finally tried this Kintsugi kit. The epoxy was easy to mix once I wrestled it out of the tube (would’ve been nicer with the usual hand-grip dispenser you get on store-bought epoxies). After that, mixing in the gold powder was smooth — just be gentle scooping it because that stuff will go airborne if you sneeze near it. The instructions say to wait longer before applying, but I did what I always do with epoxy: mixed it, gooped it on, and held the pieces for a few minutes. It set fine and was rock solid after an hour. By the next morning, I was drinking hot coffee out of it again. I even ran it through the dishwasher and tried picking at the seam while the handle was hot — still solid. The gold finish came out a little inconsistent, but I actually liked the heavier “over-applied” look. It shows the repair instead of hiding it, which is the whole point. The included silicone tools were great — easy to use, and cleanup was basically just peeling the tacky epoxy right off once it set. And bonus points: the epoxy tube has a resealable locking cap, so you can stash it away without worrying about the whole thing drying up on you. There’s a faint smell while working with it (like any epoxy), and the pigment can get messy if you’re not careful, but that’s the only real downside. The kit barely uses any product per repair, so this thing will last me a while. Verdict: If you’ve got a favorite piece worth saving, this kit makes it stronger and better looking. For me, it turned a broken mug into a story mug. Would definitely buy again, and it’d make a great gift for any DIYer. Read more

Customer review image for Fixed my favorite coffee mug — with styleCustomer review image for Fixed my favorite coffee mug — with styleCustomer review image for Fixed my favorite coffee mug — with styleCustomer review image for Fixed my favorite coffee mug — with style
Keeton K FagnaniVerified purchase
★★★★★

Worth every penny

Great value, easy to use, and is perfect and beautiful to repair broken ceramic. Works amazingly with cups for tea, it handles very well the heat. The gold is amazingly good, on the videos appears to be more white and plain, but in reality is a beautiful gold. Read more

Customer review image for Worth every penny
g3nsvrvVerified purchase
Recently Viewed

We use optional analytics cookies to understand how visitors use Ventari and improve the experience. This banner controls analytics measurement only. See our Cookie Policy.