C. J. Saute—January 3, 2026
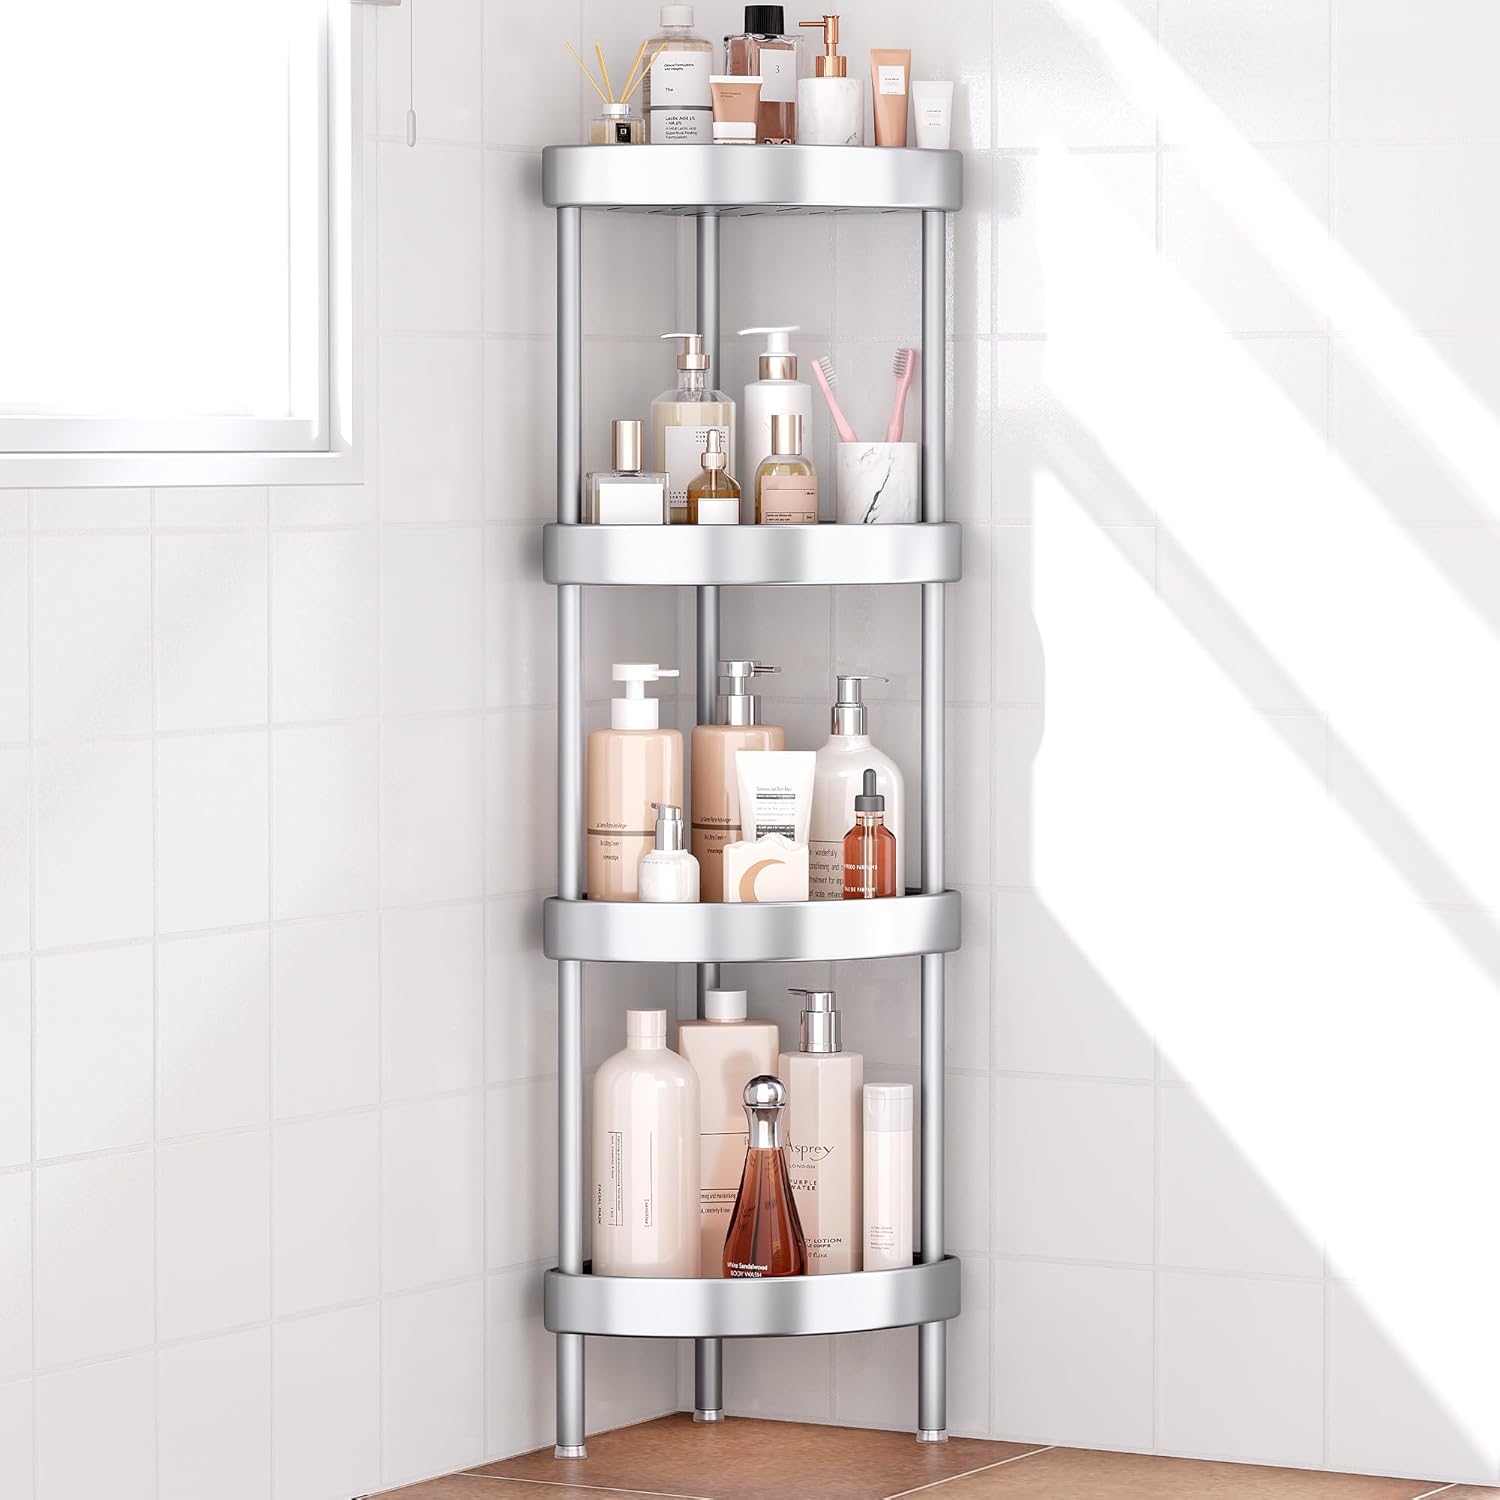
This 4 tiered shower caddy looks great in our shower. Lots of space and strength to hold 32oz bottles and all the smaller items. It was easy to assemble and the adhesive stickers are still holding strong! Read more
Deborah—August 25, 2025
Easy to assemble and install. You do need to use the adhesive anchors (sticky pads) to help keep it stable. It is quite tall and works well in our large shower area. It looks good, and so far no discoloration. It is very light weight, and the shelves hold quite a lot of items. I do wish it came with a couple of hooks, but overall a good deal for the cost. Read more
et—August 22, 2025
I purchased the Nieifi 4 tier Corner Caddy Stand from Amazon and found the installation instructions to be not only necessarily cumbersome/confusing, but incomplete and setting up users to have a failed installation. This could lead to the caddy falling over with potential injury to the user. This review focuses on detailed but simpler/clearer instructions to assemble the caddy. There will be pictures posted with this review to show some of the details of the assembly. I have also posted the included assembly instructions because I’ve not seen them in any Amazon reviews. 1. For the four tier (AKA 4 baskets) version, there are 9 long poles, and 3 short poles. If you have a 3 tier version, there will be 6 long poles, and 3 short poles. The assembly is the same but adjust for the number of poles and baskets for your version. 2. Additional hardware included are “A” screws (longer double ended screws), shorter “B” screws which are used on the top basket, and the baskets for the tiers. If you have 4 tiers, you have 4 baskets, etc. Also included are the adhesives mounts used on the top basket to adhere the caddy to the wall of your shower. 3. Each of the baskets, long poles, and short poles are identical. 4. The included instructions show the first step as screwing “A” screws through the basket into the short poles. Don’t do this, it’s cumbersome and unnecessary. 5. Instead, hand screw an A screw into each of the short poles. (Also notice that there are leveling feet on the bottom of each short pole. This is important later in the assembly.) 6. Then place a basket on top of the short poles so the A screws go through the holes of the basket at each corner 7. Next, take each of three long poles and screw them onto the A screws poking through the bottom basket. Hand tighten the three long poles. 8. Hand screw A screws into the top of each long pole you just screwed onto the first basket, and then place the next basket on top of these poles with the A screws poking through the three corner holes. 9. Repeat this until you get to the top basket 10. For the top basket you will screw in “B” screws (the shorter ones with domed tops) THROUGH the top basket into the long poles below it. Initially screw these in by hand to get them started, then tighten with the included hex wrench 11. Your caddy is now assembled, but WAIT. You’re not ready for the adhesive disks quite yet. 12. Surprisingly they left out a key part of the installation in the instructions: the caddy should be flush with the corner of your shower BEFORE you adhere the adhesive disks. Mine was not flush and was leaning forward away from the shower wall/corner. 13. Why is this, you may ask? Because shower pans naturally slope toward the drain so water from the shower will flow to the drain. 14. So next step is to adjust the leveling feet on the bottom of the short poles. You will likely need to adjust just the front two levelers. My levelers were not adjusted to the same degree, but when adjusted correctly the caddy should be flush against the shower corner, free standing and NOT leaning. 15. Next the instructions say to “screw in” the adhesive disks. This is misleading. There is a “cap nut” on the screw of each adhesive disk that needs to be removed. THEN insert the adhesive disk screw through each side hole of the top basket ONLY. Then screw the cap nut on by hand. 16. If done correctly, the caddy will be flush with the corner of your shower and the adhesive pads will be touching the shower walls. 17. The area where the adhesive disks will be applied should be cleaned (I used eyeglass cleaner wipes containing alcohol, you may need to clean more thoroughly if your shower walls are not clean in the affected areas). Be sure the area is DRY before applying the adhesive disks 18. NOW you’re ready to remove the adhesive disk backings (peel them off) and then press the disks firmly against the shower wall. Using your fingers, press the VISIBLE portions of the adhesive disks firmly against the shower walls. Both ABOVE the basket and BELOW the basket. What about the adhesive disk portion that is BEHIND the raised edge of the basket? I used a regular table knife to press the adhesive disk behind the basket walls to firmly adhere it to the shower wall. 19. Wait 24 hours before placing items in the baskets so the adhesive disks have time to “cure” 20. You will have leftover hardware: 2 adhesive disks, 3 A screws, 2 B screws, and the hex wrench 21. (I will not comment on the quality of the caddy until I’ve had time to use it) Read more
Frank—July 22, 2025
Made out of a very durable material and extremely easy to set up. Never read the instructions. It brings adhesive cups to attach and keep a steady and fixed look in the shower. I have to say I’m really impressed by this product for its price, I’ve seen similar for far more expensive (back in the Bed Bath and Beyond days) Caution. Be careful while setting up some of the tube columns edges can be just a bit sharp. Also make sure not to switch the bases around as once you screw the tubes they can get a circular-shaped scratch after being installed. So make sure that you’re sure which base you’re installing at the top. Also I recommend starting installation from the botttom. Read more
J. Jeffrey Gephart—January 4, 2026
Very easy to put together and looks great - almost as good as the price! Read more
Gwen Alexander Wood—November 11, 2025
Bought this for my newly remodeled shower. It has spacious shelves and the shelves have great drainage. No rust evident so far and it’s very sturdy as well. I’m very pleased with this shower caddy. Highly recommend! Read more
GRANDMA ANN—July 30, 2025
WILL NOT STAND UP, NEED TO STICK THEM ON THE SIDE OF YOUR SHOWER. I DID NOT OPEN THE PKG FOR A MONTH SO COULD NOT RETURN. BUY THE WOOD STAND, ITS MUCH BETTER. TOSSED THIS IN THE TRASH Read more
BT—August 6, 2025
Easy to assemble, looks really good, is stable and holds a lot of things. I added a few hooks so I could hang my razor, back brush etc. Love it! Read more